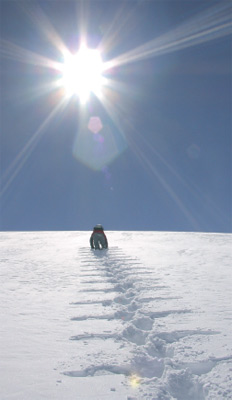
Adventure, adrenaline, risk… Freeriding delivers the dream rush, but the payback can be brutal. In the Alps last winter, 105 people were killed in avalanches, the highest death toll on record, and many more were injured off piste. Cue Cooler’s guide to playing safe in the backcountry.
Words by Amanda Maclean and Matt Barr
Mountain Awareness Part One: The Signs are There
The rules
Before snowboarding took off, going off piste was the preserve of expert skiers. It took years for them to develop their skills, which meant they honed their mountain awareness
and experience at a similar rate. Then along came snowboarding. Compared to skiing, snowboarding in powder was such a cinch that novices with little or no mountain awareness started venturing off piste too. Fat skis followed snowboards, which opened the powder gates for intermediate skiers, and hence we’ve arrived in a new and dangerous era where an alarming number of riders – both skiers and boarders – are ducking under ropes, ignoring signs and playing blind off piste.
On or off?
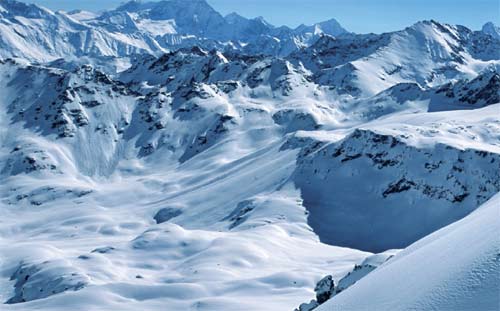
So what exactly do ‘on piste’ and ‘off piste’ mean? Pistes are groomed slopes marked out by the resorts as areas to ride on. Off piste is any area out of these marked slopes, be it the ungroomed sections to the sides of pistes, areas between the pistes, or larger areas outside the main ski area, known as backcountry. In some resorts there are also marked, but ungroomed runs called itineraries. Chamonix’s Vallée Blanche and Verbier’s Tortin are famous examples. Generally, off-piste areas are not patrolled (looked after by pisteurs) unless they’re within the ski area boundary. Check your insurance to make sure you’re covered. It’s a misconception that the more dangerous parts of a ski area are difficult to get to. In reality, a slope between two pistes can slide just as easily as a backcountry bowl if provoked, or be laden with hidden crevasses if it’s on a glacier. Any off-piste area has inherent risks, so be aware that when you duck under a rope you’re riding in dangerous territory. Minimise the risks by reading all the signs: the warnings, the weather and snow conditions and your own ability.

Busted!
Laws and attitudes towards off-piste riding vary around the world, and often from resort to resort. The litigious nature of the US and Canada means that their resorts have strict
rules on mountain behaviour, and ducking under the rope is likely to end with your lift pass being confiscated, or in extreme cases in which your actions lead to other people
being hurt, a manslaughter charge. Europe, in general, has a more liberal attitude, with the onus being on the rider to take responsibility for themselves. However, with
the increasing number of off-piste accidents in recent years, some ski patrols are taking a tougher stand and arresting riders who they think are putting themselves or others at risk.
The weather and snow conditions
Both the weather and the snow conditions can change incredibly fast in the mountains, so when you plan any kind of backcountry riding, get informed. First off, check the avalanche hazard rating at the main lift station. The 1-5 scale (5 being the greatest risk) will help you assess potential dangers. There’ll also be flags displayed at popular backcountry routes. Yellow and black checked flags denote an avalanche risk of 3 or 4 and black denotes a risk of 5. Ask a ski patroller if you’re not sure, and don’t just follow the next rider. In some countries, you can tune in to national and regional avalanche bulletins on the radio or internet. The Swiss federal institute for snow and avalanche research in Davos, for example, has daily avalanche danger forecasts and snow conditions on its website for the whole of the swiss alps (www.slf.ch).
Next, check the local weather forecast. Heading off into the backcountry if there’s a storm approaching is foolish, and if it’s going to rain your chances of riding any powder are out the window anyway. Mountain weather forecasts are by no means infallible, but have an idea of what to expect, and dress and pack for all eventualities. You can usually find the local weather forecast in the tourist office, the mountain guides’ office, on the radio or on the resort’s website.

Wind, temperature and sunshine are major governing factors in the stability of the snowpack, so the risk of riding a particular slope will change throughout the day. A slope’s aspect – which way it’s facing – is a major consideration. ‘North-facing slopes can have a dramatically different snowpack to south-facing slopes, and riders need to be aware of that,’ says Warren Smith, a leading freeskier and director of the Warren Smith Ski Academy in Verbier. ‘If you’re riding a south-facing slope, do it in the morning, as early as possible, as the snow will normally change before lunchtime due to heat from direct sunlight. Slopes that have been battered by the wind are best left alone. The wind slab snow layers are prone to avalanching and often slide over a wide area.’ Also get into the habit of asking and listening to local experts who know the backcountry better than you do, and if they tell you a particular slope is dangerous, don’t go there. ‘Knowledge and advice from a local guide on the area you are riding in is always worth knowing and listening to,’ adds Smith.
If you’re riding in unfamiliar off-piste terrain, the safest option of all is to hire a uiagmqualified mountain guide. A guide will steer you clear of danger, show you the best routes, and find the best snow. Just make sure you give an accurate description of your group’s ability before you head out for the day. Prices vary from country to country, resort to resort, but it’s money well spent when you split the cost with a group and wind up having your best day’s riding ever.
International Scale of Avalanche Hazard Rating
This 1-5 scale (5 being the greatest risk) will help you assess the potential dangers of avalanches:
1. Low: natural and human triggered avalanches are unlikely.
2. Moderate: natural avalanches are unlikely, human triggered avalanches are possible.
3. Considerable: natural avalanches are possible. Human triggered avalanches may occur and therefore freeriders should use extra caution, especially on steeper terrain. Avalanche danger is localised, in these areas/pockets the risk can be considerable. These can be dangerous especially on lee slopes (subject to rapid snow accumulation during storms or windy weather) where wind slab may have built up.
4. High: natural and human triggered avalanches are likely. Off-piste skiing and boarding is not recommended.
5. Extreme: human and natural avalanches are certain. Stay on piste or in the bar. Going out to the backcountry is not brave, it’s crazy.
Your ability
How to snowboard in powder, by Ruth Leisbach, Three-Times Winner of O’Neill Extreme Freeride contest in Verbier
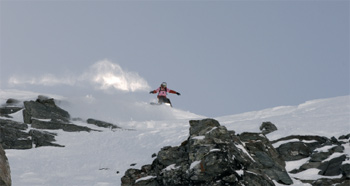
To be safe off piste you need to ride the piste well and in control. No matter how trained and well equipped you are, have a big respect for the mountains and understand that the mountain still makes the rules, not you. Be humble and listen to your feelings. To ride powder, put your weight more on your back leg and turn from there. If you put too much weight on the nose of the board you’ll flip over. You need more speed to turn in powder, so try to make quite big turns and push with your back leg at the end of the turn
to make a big spray and to slow down a bit so you can check the terrain and where’s best for the next turn. Try to float and be light on your board. You can lean more into your turns in powder, but don’t bend from your waist. When you fall in deep powder, it’s sometimes hard to get up again. Get back up on your frontside edge and press the snow around
you. don’t lose your motivation if it doesn’t work straight away. Try again on easy stuff.
- 1. Feel it and enjoy it.
- 2. Be properly trained and equipped.
- 3. Weight on the back leg.
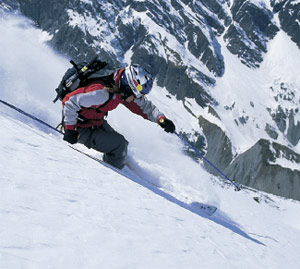
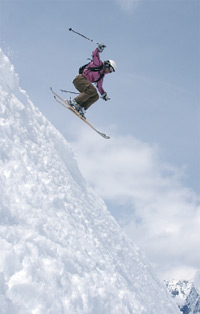
How to ski in powder, by Andrea Binning, World Freeskier
Powder skiing is the ultimate experience and something every skier should strive to achieve. When you get good you’ll be able to ski steeper lines more aggressively because the powder will slow you down. To ski off piste you need to be a solid parallel skier. Skiing powder is different to skiing piste. You need to have your feet under your body and not too far forward or behind, so keep your weight central, and not forward, and your weight evenly distributed over both skis. Turning in deep powder is all about finding your own rhythm. Aim for a bouncing motion where you flex and bend at the waist, ankles and knees at the end of a turn and then extend as you come out and into the next turn. Enjoy!
- 1. Use fat skis to ski powder.
- 2. Don’t have your weight too far forward.
- 3. Don’t give up!
Mountain Awareness Part Two: Avalanche Safety
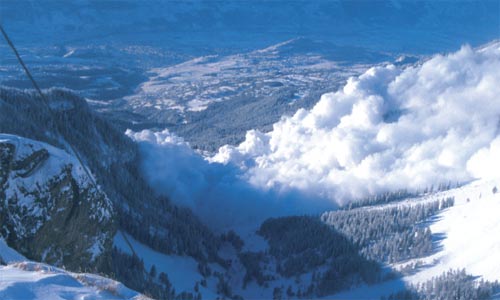
Without a doubt, avalanches are the biggest danger faced by any rider venturing into the backcountry. In many ways, they are beautiful forces, showing nature at its most primal. But make no mistake: they are hugely powerful and destructive, capable of transforming the landscape from a scene of tranquil beauty into one of utter carnage within seconds. Even more frighteningly, they do not defer to experience. Each year, hugely competent riders are killed along with those who are blissfully ignorant of the inherent dangers. ‘An avalanche doesn’t know whether you’re an expert or not,’ says Andre Roch, a key figure in avalanche research in Europe.
For newcomers to off piste, be aware that dangers are everywhere, and it’s often the mellower slopes, with gradients of 25 degrees or less, that are the real killers, mainly because riders look at them and think, ‘That’ll never go!’ but they do. And often.
So why do they happen? Typically, they occur when layers of snow build up, causing one layer to release and trigger a slide. The sudden cumulative effect of this weight of the snow and the force of gravity very swiftly causes the slide to increase in power and destructiveness. There are different types of avalanche, from the harmless ‘sluff’ caused by surface snow on the snowpack, to the deadly ‘slab’ type. These killers can be hundreds of metres wide and several metres deep and once they get going, they don’t stop until they reach the bottom, taking out everything in their path. ‘A typical dry snow avalanche travels at around 60-80 mph, often reaching those speeds five seconds after the fracture,’ says Jimmy Oden, UIAGM mountain guide and author of ‘Free Skiing, How to Adapt to the Mountain’ (www.freeskiing.nu)
Risk assessment
Avalanche risks can never be completely eliminated, only minimised. This means that good backcountry practice is about arming yourself with the knowledge to make sensible judgments, so you can avoid being in a situation that you can’t easily escape from. ‘The first step is to understand why avalanches happen, where they’re likely to happen and
in what conditions,’ says Ewan Wallace, a pro snowboarder with years of experience in the backcountry. ‘Forewarned is forearmed.’
Wind, temperature change, the type of snow crystals, the gradient of the slope are all indicators of how likely a slope is to slide. Has the sun been on the snow all day, loosening the grip on the layers below? Has the wind whipped the top layer into a hard complete crust? Does the slope you’re on lead into a narrow funnel that looks like an avalanche route? When did it last snow? ‘Knowledge and awareness of what can happen is really important. Knowing where your safe exits are and where the exposure is are all factors that are going to help you if you’re caught in an avalanche,’ says Binning.
If you’re serious about minimising the risks go on an avalanche safety course. You’ll learn about the snowpack – the layers of snow that have built up over the course of the
winter – and the importance of recent local weather conditions. The Ski Club of Great Britain reported that last winter’s spate of deadly avalanches was due to how the snowpack formed during the season. Little snowfall at the start of winter meant only a thin snowpack formed, so when extremely cold temperatures hit in January large ‘depth hoar’ crystals formed weak layers on top of the thin layer. Heavy snow then fell on this unstable snowpack in February and March, hence the high avalanche risk. ‘It was like putting a large,
heavy weight on the top of a load of ball bearings,’ said Fiona Sweetman at ski club.
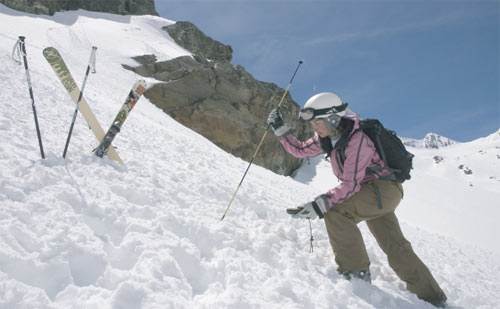
Digging a snow pit is the best way to learn how to ‘read’ and assess the snowpack and work out how risky the slope you’re about to drop in on really is. It’s common practice for
guides or pros filming deep in the backcountry to dig before they ride. ‘You learn a lot about the way snow behaves, and it could save your life,’ says Stuart Pitches of Facewest.
Buddy Up
Once you’ve evaluated your chosen line, it’s still important to take precautions, so get in the habit of riding smart. Always tell people where you’re going, and never go off to tackle any pow runs on your own. Three is a good-size group, as sheer weight of numbers on a slope can also trigger a slide. Never cut above somebody and drop in one at a time, rather than spread yourselves out and be compromised. ‘Have everyone’s eyes on you when you’re riding so they can get to you straight away should the worst happen,’ says Binning.
Avalanche!
If you do trigger a slide, the usual advice is to try to keep above the snow by ‘swimming’. If you are buried, be aware that the snow sets solidly as soon as the slide stops, so clear space around your airwaves if you can to enable you to breathe as you wait for help. 75 per cent of people who die in avalanches die of suffocation. ‘The only failsafe way to avoid an avalanche is not to drop in at all. If in doubt, turn away,’ says Wallace.
Take a hike
Any proper excursion into the backcountry involves a lot of hiking, but what many people don’t realise is that hiking is often as dangerous as the riding itself. To minimise the dangers going uphill, apply common sense and some rudimentary mountain awareness. The defining characteristic of an avalanche is that there’s a large amount of snow
all together, so it follows that if you avoid areas where there’s lots of it you’re less at risk. For this reason, ridges are the best route, because snow never gets the chance to build up. If you’re hiking a ridge, know what you’re letting yourself in for. Be sure of the ridge’s course from start to finish, and don’t even begin if you’re not happy about any section on route. Find out from a local guide what the conditions are like underfoot, and make your assessment before you start.
Snowboard and ski boots don’t have the best grip on icy or rocky sections, so crampons or snowshoes are a safer bet. Have your skis or board on your pack to keep your hands free for hiking. Ridges are exposed, so be prepared for wind chill. Other obvious points are to avoid standing on cornices, and avoid hiking underneath them. Convex slopes – that bulge outwards – are also particularly at risk of avalanche, so look at the lay of the land and if you see a alternative route past it. Don’t hike up very exposed slopes with cliffs below them; if the slope were to slide, you might get swept off. Hiking is pleasant when you’re properly prepared. ‘Take plenty of food and water, and wear layers that you can strip off if you get too hot. Bring sunglasses as your goggles will steam up, and apply sunscreen frequently,’ says Wallace.
Courses & Clinics
If you’re heading off piste this season, ride smart and attend an avalanche safety and mountain awareness course.
• Ski Club of Great Britain is holding two avalanche awareness weekends in Argentière, France, this season on January 11-14 and March 15-18. It is also running a series of avalanche awareness evening talks in November at Snow & Rock stores throughout the UK. Visit www.skiclub.co.uk
• Mountain Awareness is running avalanche safety 1-day courses in Verbier every Wednesday from December to the end of January, and on weekends on request. Also look out for their Transceiver search and practice events taking place in Verbier and St Anton, where you can test out off-piste gear and enter competitions. Visit www.mountainawareness.com
• Practise using your avalanche beeps at the new avalanche camps in Meribel and Courchevel, France this season. Special zones at the bottom of Suisses chairlift in Courchevel 1850 and at the bottom of the Plan des Mains chairlift in Mottaret have been set aside for avalanche training. Local experts are on hand to help and answer questions on off-piste safety. Sessions are usually free and open to everybody. Visit www.s3v.com and click on avalanch’ camp.
• Facewest runs backcountry training courses in the UK, particularly aimed at seasonaires. Visit www.facewest.co.uk
• McNab Mountain Sports runs comprehensive backcountry snowboarding courses in Chamonix. Visit www.mcnab.co.uk
• Chocolate Freeride runs big mountain ski camps in Verbier. Visit www.chocolatefreeride.com
• Mountain Tracks runs avalanche awareness courses based in Leysin, Switzerland. Visit www.mountaintracks.co.uk
• Wendell’s Mountain Skills runs avalanche awareness training courses in the Cairngorms, Scotland. Visit www.hillskills.co.uk
Mountain Awareness Part Three: Search & Rescue
What to expect
If the worst case scenario does happen and your buddy is buried in an avalanche, try to stay calm, because you’ll need to think before you act. The ongoing minutes will be crucial but highly stressful so you should let the most experienced member of the group take charge. If you have enough manpower, send somebody to get help. To help narrow the search area, try to remember where you last saw your buddy and estimate the speed of the slide. Mark the spot with a board or skis, and scan the surface area for debris, or an arm or leg sticking out of the snow, to see if you can affect a search without having to use your transceivers.
How to conduct a search
This is where the importance of having done an avalanche course and regularly practising search procedures becomes paramount. Everybody in the rescue party should turn their transceivers on to ‘receive’ and ensure their transceivers are at maximum sensitivity. It is important to act quickly and efficiently, as the chances of finding an avalanche victim alive diminishes rapidly the longer the search takes. After five minutes, 90 per cent of avalanche victims are found alive. At 30 minutes, it’s less than 50 per cent.
Using rescue equipment
Ideally, the group must be no more than 30m apart, although a bigger slide will mean the snow must be searched in sections. Battery power, the cold and interference often combine to reduce a transceiver’s effectiveness, so keep this in mind. The searchers go forward slowly, taking care to cover every area with their transceivers until a signal has been picked up. At this point, only the most experienced searcher should move until they also pick up the signal. They then proceed with the search until they make contact while the other members ready themselves with shovels and probes. Once the signal is strongest on minimum sensitivity, mark the position with a probe and begin the ground search.
Emergency first aid
Probe until you make contact with the victim, and leave the probe in place as you dig around it. Have one digger making the hole deeper and another clearing the snow away from the top. be sure to use your probe to make sure you have the right position as you dig deeper. They come into their own here. When you reach the victim, clear the head immediately and make sure the airwaves are open. First aid, pre-practised and learned before this moment, could always makes sure she has a good first aid kit to hand. ‘Make sure you always have a medical kit with you so that you can treat, or be treated, immediately,’ she says.
The victim will be in shock, near to hypothermia and might have sustained injuries from snow and rocks. Protecting them from the elements as help arrives is the priority here. If you’re near the resort, help should arrive soon but, if not, you will need to plan the next course of action, bearing in mind you and your friends are in a position of extreme avalanche danger. ‘Sometimes the safest thing to do is stay put until the situation improves. I have been stuck in a refuge for three days waiting for the snowpack to stabilise after a 2m snowfall. Better to be late back than to risk being killed,’ says Stuart Pitches of Facewest.